Building an Email to ntfy.sh Notification Service with Cloudflare Workers
March 16, 2025 by Sharjeel Aziz4 minutes
Imagine you're a DevOps engineer responsible for monitoring critical infrastructure. You receive alerts via email, but you want to get these alerts as real-time notifications on your phone or other devices. Email traditionally relies on a pull-based system, requiring users to check for new messages. By integrating Cloudflare Workers and ntfy.sh, we can transform it into a push-based service that delivers real-time notifications.
In this blog post, we’ll walk through the process of building a Cloudflare Worker that forwards emails as notifications to ntfy.sh. This project leverages Cloudflare’s powerful serverless platform to handle email routing and forwarding seamlessly.

What is ntfy.sh?
ntfy.sh is a simple, free, and open-source service for sending notifications. It allows you to send notifications to your devices via HTTP, making it easy to integrate with various services and applications. With ntfy.sh, you can receive notifications on your phone, desktop, or any other device that supports HTTP. ntfy.sh supports email publishing, however, I wanted something for a self hosted ntfy.sh service.
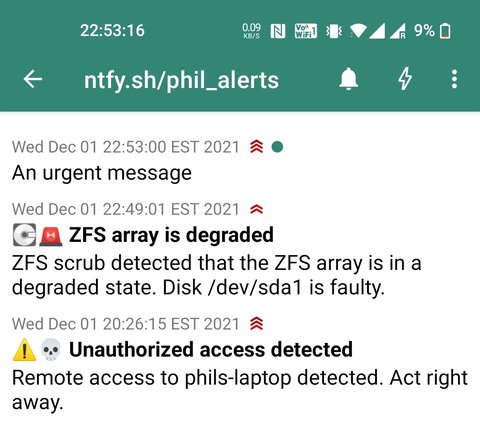
Here’s an example of a simple cron job that alerts the user when disk space on the root disk is running low. This demonstrates how ntfy.sh can be used to send instant notifications for critical system alerts, similar to how email alerts can be forwarded as push notifications using Cloudflare Workers.
#!/bin/bash

mingigs=10
avail=$(df | awk '$6 == "/" && $4 < '$mingigs' * 1024*1024 { print $4/1024/1024 }')
topicurl=https://ntfy.sh/mytopic

if [ -n "$avail" ]; then
  curl \
    -d "Only $avail GB available on the root disk. Better clean that up." \
    -H "Title: Low disk space alert on $(hostname)" \
    -H "Priority: high" \
    -H "Tags: warning,cd" \
    $topicurl
fi
What is an Email Worker?
With Email Workers, you can leverage the power of Cloudflare Workers to process your emails and create custom workflows. These workflows allow for email forwarding, spam filtering, or triggering notifications based on incoming messages.
Here is an example of an Email Worker:
export default {
  async email(message, env, ctx) {
    const allowList = ["friend@example.com", "coworker@example.com"];
    if (allowList.indexOf(message.from) == -1) {
      message.setReject("Address not allowed");
    } else {
      await message.forward("inbox@corp");
    }
  }
}
Setting Up the Project
You can use this project as is, after updating the values in wrangler.jsonc and creating the Cloudflare secrets for ntfy. You are also welcome to modify the project to your needs and test your changes by running yarn test and creating the Cloudflare secrets for ntfy.
Step 1: Clone the Example Project
First, clone the example project from GitHub:
git clone https://github.com/sharjeelaziz/email-ntfy.git
cd email-ntfy
Step 2: Install Dependencies
Next, install the necessary dependencies using Yarn:
yarn installStep 3: Update Configuration
Update forwarding_address. This address must be verified. You can add and verify this address on the Destination addresses tab.
{
  "name": "email-ntfy",
  "main": "src/index.ts",
  "compatibility_date": "2024-01-05",
  "observability": {
    "enabled": true,
    "head_sampling_rate": 1
  },
  "vars": {
    "forwarding_address": "catch-all@example.com",
    "allowed_senders": ["sa@example.com", "alarms@example.com"],
    "allowed_domains": ["example.com"],
    "tz": "US/Eastern"
  }
}
Step 4: Deploy the Worker
Deploying the worker is straightforward with Wrangler. Run the following command to deploy your Cloudflare Worker:
yarn deployStep 5: Configure Secrets
Next, you’ll need to configure your secrets for the ntfy.sh service. If using a self-hosted ntfy.sh with authentication, set NTFY_TOKEN. Otherwise, you can use a dummy value or modify the code to remove the token-related code.
npx wrangler secret put NTFY_TOKEN
npx wrangler secret put NTFY_TOPIC
Once entered, you’ll receive a confirmation message:
✔ Enter a secret value: … *************************
🌀 Creating the secret for the Worker "email-ntfy"
✨ Success! Uploaded secret NTFY_TOPIC
Step 6: Set Up Email Routing
To enable and add your first Email Worker, follow these steps:
- Log in to the Cloudflare dashboard and select your account and domain.
- Navigate to Email > Email Routing > Email Workers.
- If the deployment was successful, you should see
email-ntfyas one of the available workers. Select Create route to create an email for your domain that routes to this worker. - Note: You must create a new route to use with the Email Worker you created. You can have multiple routes bound to the same Email Worker.
Step 7: Verify the Setup
Send an email to the registered email address.
You should receive an ntfy notification for the selected topic.
Tips
- Change the
namefield inwrangler.jsoncto deploy a separate worker with a different topic.
Conclusion
With Cloudflare Workers and ntfy.sh, you can easily set up a reliable email forwarding service that sends notifications to your desired endpoint. This approach ensures real-time email alerts without manually checking your inbox.
Image credit: ntfy.sh